Leave at least 1.5cm between the TIZIP + 210D fabric combo and the edge of your Iron Raft’s fabric piece, as you’ll need to use this space for your seam strips when assembling your raft.
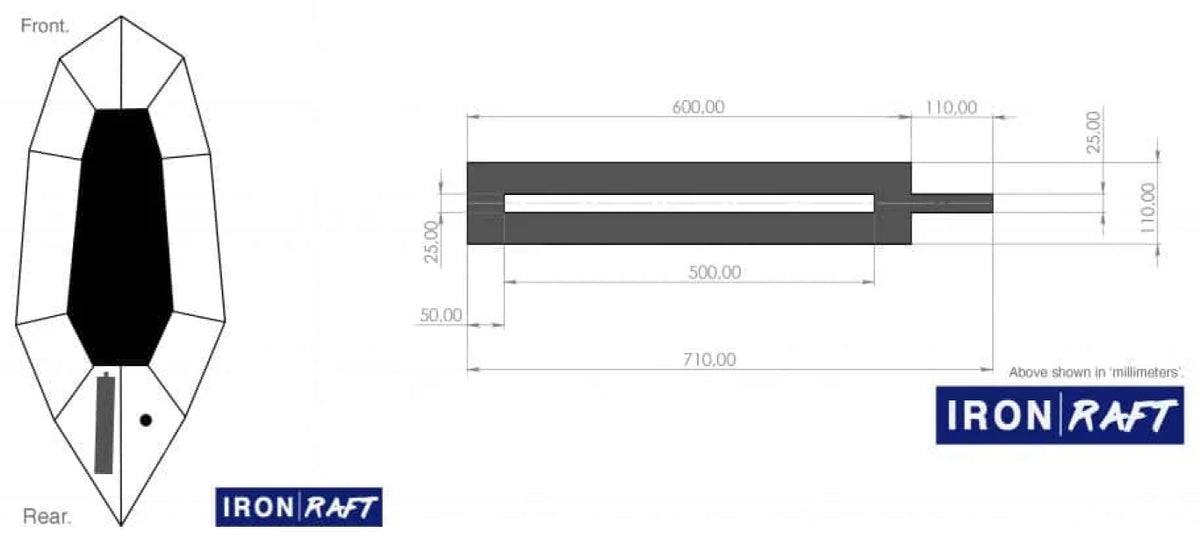
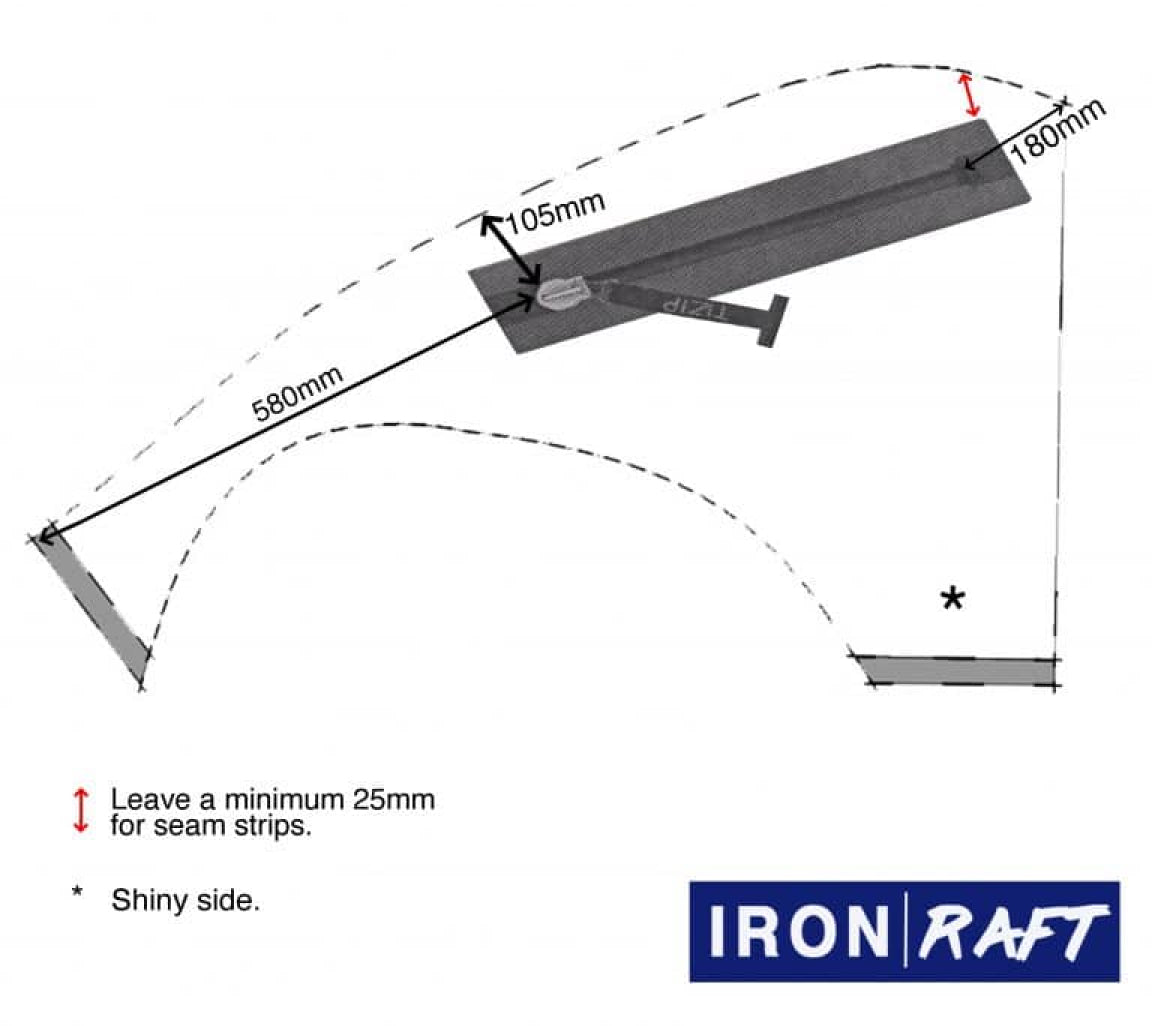
Now mark up on the rear panel where you’ll cut the slot for the TIZIP to fit through, and then cut it out. We recommend roughly 500mm in length and 70mm in width.
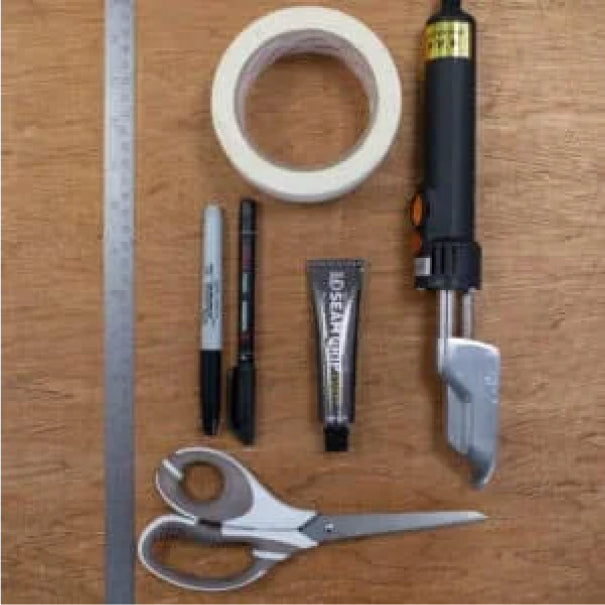
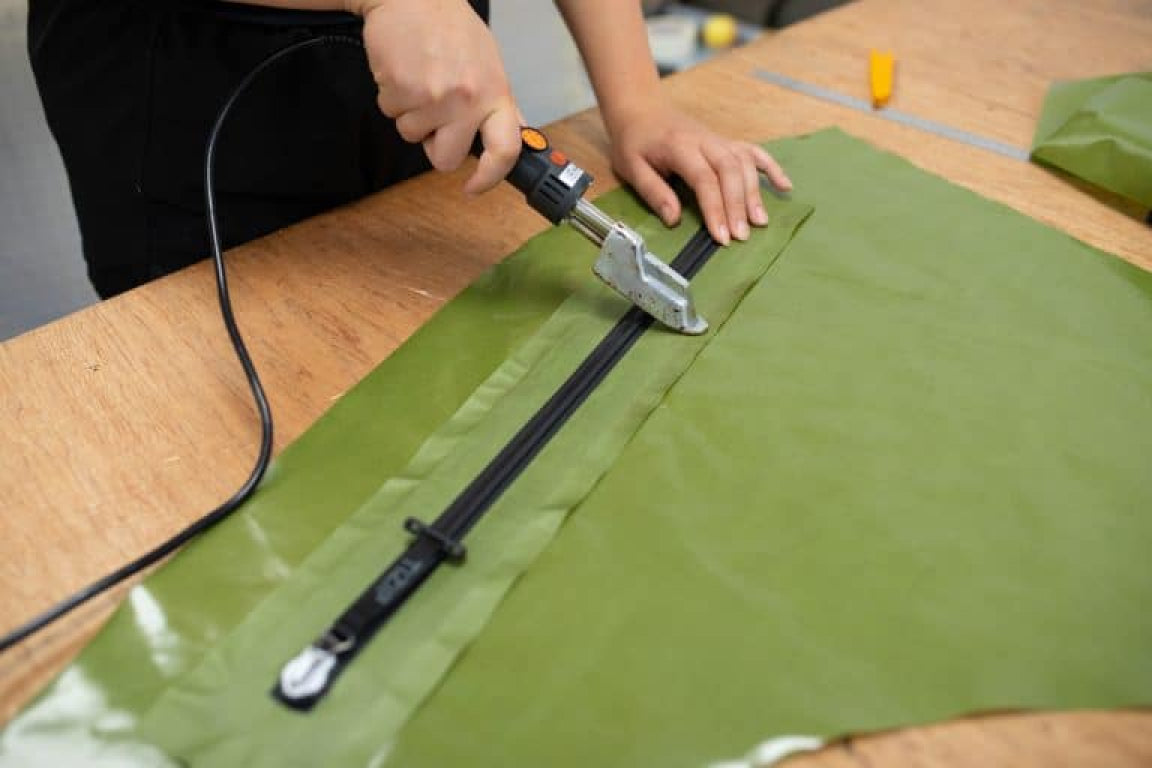
Flip the TIZIP over and apply a strip of masking tape over the zipper’s back (this is to reduce the risk of getting glue inside the zipper). Grab your Aquasure glue and apply it to the edge of the TIZIP fabric, where the 210D fabric joins inside the raft. This is to ensure that the bond is air and watertight.

Leave the Aquasure to dry for 24 hours. After waiting for the Aquasure to dry, apply a small amount of baby powder to where you applied the Aquasure, this ensures it doesn’t stick/ tack to itself. After this step is done, you have installed your TIZIP to your Iron Raft!
Now that you are done installing your TIZIP, use the included lubricant to aid your zipper in opening. There are instructions on the process of lubing your TIZIP included in the leaflets you receive. If you have lost them, don’t worry, take a look here.
1b) INSTALLING ONTO A PRE-MADE IRON RAFT:
Cutting a slot in your Iron Raft for the TIZIP. Start by inflating your Iron Raft, place the zipper on the rear of your raft (as shown above) and then mark where you’ll cut the slot for your TIZIP. Using masking tape to hold the TIZIP in place whilst you mark is a good idea.
Now mark up on the rear panel where you’ll cut the slot for the TIZIP to fit through. We recommend roughly 500mm in length and 70mm in width.
Deflate your Iron Raft and cut out the slot that you marked.
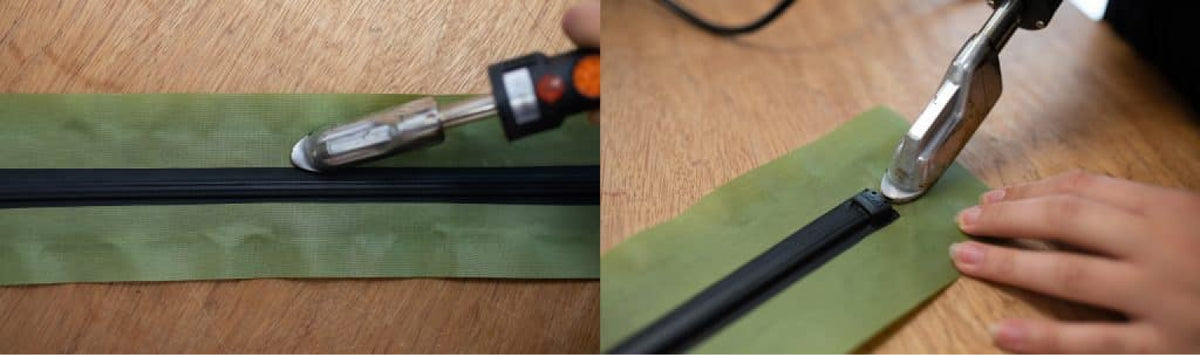
Before ironing, create a flat heat resistant surface inside your Iron Raft, for you to iron the TIZIP to your raft.
Then begin ironing TPU side to TPU side, the TIZIP + 210D fabric combo to your Iron Raft. After heat sealing all the way around the TIZIP, open the zipper to ensure that you have heat sealed suitably.
Open the TIZIP apply a strip of masking tape over the zipper’s sides (this is to reduce the risk of getting glue inside the zipper mechanism). Grab your Aquasure glue and apply it to the edge of the TIZIP fabric, where the 210D fabric joins inside the raft. This is to ensure that the bond is air and watertight.
Prop the TIZIP and the opening up, and leave the Aquasure to dry for 24 hours. After waiting for the Aquasure to dry, apply a small amount of baby powder to where you applied the Aquasure, this ensures it doesn’t stick/ tack to itself.
Now that you are done installing your TIZIP, use the included lubricant to aid your zipper in opening. There are instructions on the process of lubing your TIZIP included in the leaflets you receive. If you have lost them, don’t worry, take a look here.
IRONING YOUR GRAB LOOP –